Just read a beautifully written post by Lynn Krawcyk, also known as Fibra Artysta. In it, she describes what it is about her studio (a room in her house, similar to mine) that renders the space sacred. I think we all forget about acknowledging the importance of certain things and activities in our lives, and taking the time to think about allowing ourselves to separate from the mundane, the chatter, the everyday tumbly-pumbly, roly-poly, pell-mell THINGS that always seem to consume us and keep us from contemplation.
I know I've forgotten about it, and I can always feel the pull to draw away from all the THINGS (and people) in order to focus solely on creating. There is nothing like that feeling of time being suspended while "in the zone." It sounds cliche, I know, but it is real.
Back when I was in college, it was a lot easier to allow myself to fall into that NeverLand - the Fine Arts buildings on campus were usually left unlocked and were regularly patrolled by campus security, so an ever-changing group of us art students would meet in a particular classroom to work on projects until the wee hours of the morning, uninterrupted by phone calls, door bells, chatter, outside demands. Other groups were there in other classrooms, so there was always opportunity to wander through the fine art buildings and visit with other artists and view works in progress. Sometimes these visits would provoke conversations, or afford a glimpse into another artist's inspiration or methodology that would often result in another "aha!" moment that would spark another creative idea and prompt a return run down the hall to implement it before it dissipated. I truly miss those type of sessions and interaction with other creative people. I longingly make up for it now by reading creative/artistic/crafty blogs, magazines and books, and have accumulated an embarrassingly large collection of them - they often compete for space with the fabrics & supplies in my tiny craft room. All of these things have spilled over into other rooms of the house; my cutting table (with various projects in mid-production) is in the nearby living room, half-finished knitting projects live in the family room, ready for a bit of work while watching TV or a movie, and dozens more books & magazines are piled up in my bedroom. Reading crafting & sewing books right before I go to sleep is probably the dumbest thing I do - it often leaves me unable to sleep for all the ideas tumbling through my head.
After reading her post, I'm feeling better about all of this (except for the spilling-over part, anyway). I need to continue to think of my studio room, my materials, and my using them as sacred - not in a religious sense, just as having a respected place in my mind & in my heart, and entering that room with "letting go" as a mantra.
Wonder how long that will last, considering my studio has only an open doorway (no door) directly across from the front door, two large windows that look outside toward my next-door neighbor's living room, and a large cutout window in the remaining wall that opens to my own living room and a view out the bay window. Too many chances for the outside world to creep in, I think.
As far as a crafty post goes, most of my day was spent in headache-land, though I did manage to work for a few hours on a crochet project with my son's girlfriend. Amazingly enough, the Sewing Assistant left us alone, and was happy to simply sun himself in the bay window while we were working. We finished the crocheting part; now all she has to do is stuff the pieces & sew them together. We'll photograph the finished project and I'll post it a bit later. Since my son doesn't read my blog, I can tell you what it is: the two of them love Japanese animation, and adore the movie "My Neighbor Totoro". So she found a pattern to crochet my son a Totoro of his very own, and it was an ambitious first project for her to tackle (that's where my help came in). I hope she feels good enough about it to want to try something else - I've helped her sew a costume, and she seems thrilled by having a finished, handmade article in her hands. I know it makes me feel good to be able to pass on my knowledge of these traditional crafts, even when they are used in unconventional ways, and to be present to see someone else have that "aha" moment.

Musings on sewing, embroidering, knitting, crocheting, and general crafting. Not necessarily in that order.
Sunday, February 27, 2011
Monday, February 21, 2011
Progress - A Good Thing, When It Happens
Still contemplating shoes. I'm not too sure that the pattern I drafted in my last post is going to give me a better fitting upper, so I need to try out a shoe in some sample fabric. In the meantime, I happened across this fabric at Joanns the other day - in the remnant bin - and, BONUS! The original fabric was on sale, so that meant the remnant was on sale as well! If this works out, I could get several pair of shoes out of this piece, and it only cost me about $2.10. What a deal!
The boss-man at All American Signs and his handy crew designed this, designed the graphics for it (the striping is a brain-bender, tell you more in a sec), built it at the shop, and installed the lighting, complete with a dimmer switch. My paltry involvement? The custom black awning you see that mimics the curve of the clear etched sign. It had to fit tight, flap at the sides, tie around the awning knobs (which you can't see here), and velcro to the front and back crossbeam. THAT'S what the Sewing Assistant was sitting on a couple of posts ago, LOL! (Get it? A couple of posts? Badum-ching!)
 |
| OOOOO! Pretty denim! Even prettier price (half of what you see here)! |
 |
| A detail of the embroidery on the denim. |
I am pretty sure I have a similar weight denim to try the new shoe pattern out, before I cut into this pretty stuff. Stay tuned!
In other news.....my boss said I could post photos of the >ahem< project I was working on with the Sewing Assistant's "help." I'm excited, because the whole thing came out looking DASH! The client is Custom Candy Buffet Bars, and their website is here: http://www.customcandybuffetbars.com/#/home
Click there, and you can see what type of functions they go to - the finished product made it up to the American Idol taping this past Sunday! (Does that mean I can tell people my work was seen on American Idol? Alas, no - only backstage!)
 |
| Ta da! The finished product! About 5 ft long, about 5 ft high, and about 2ft deep. |
 |
| OOH! AAH! This is what it looks like lit up - like it would be at an event like, let's say, AMERICAN IDOL! |
Two of the neatest design elements:
1) look carefully at the striping. It goes from top to bottom, including the beaded molding at the top and bottom. But wait - there's more! It is also seen on the platform shelf (the second line of striping in the middle) which
2) pulls out of the unit completely, flips upside down, and becomes a slanted shelf with a stop edge to it. And the striping matches, whether it is in the unit as you see here, or flipped and inserted as the slanted shelf!
I love working with these people - always something interesting popping up! (Sometimes literally!)
By the way, that sucker you see inserted in the back, there? Was about 18 inches tall and felt like it weighed about 4 or 5 pounds - the label said it was 47 servings, LOL!
Hopefully at some point, a photo of the finished and FILLED candy bar will make it to their web site - fun!
Sunday, February 13, 2011
Shoe Obsessed
...but it's not what you're thinking!
Remember the handmade shoe I was posting about the other night?
Remember the handmade shoe I was posting about the other night?
 |
| The very shoe in question! |
I haven't moved any farther on the manufacture, as the issues I previously mentioned are still bugging me. The Shoeology patterns I purchased came with a pretty detailed (and photo-laden) set of instructions on how to make them. Only problem is, she supplies whole and half sizes of the soles, but only whole sizes of the uppers. Sadly, I wear about a size 5.5 shoe and have fairly narrow feet. In its first incarnation, I used the 5.5 sole and chose to use the size 5 upper, as they were grouped together in the pattern printouts (as were all the other sizes). When I sewed these together, the shoe was ridiculously tight fitting from toe to heel, though it fit in width. In my second attempt, I cut the size 6 upper and sewed it to the existing 5.5 sole. This resulted in a better fitting shoe, but for two problems: too much width in the toe box, and too much fabric to go around the toe of the sole. If you look closely, you can get see the resulting pleating/gathering that occurred at the tip of the shoe. Probably not something I would wear very often, if at all. What to do, what to do? I did a couple of things: first, I hit my fave Assistance League store, looking for a pair of shoes that might help me make a pattern, and/or provide a usable sole (after cutting or peeling away the upper part of the shoe);
 |
| Anyone remember Bass shoes? Anyone? Anyone? Beuller? Beuller? |
then, I went to this web site
( http://www.breakitdowndesign.com/learn_to_make_shoes_pattern.htm ) and followed their instructions for how to make a pattern based on the measurements of your own feet, not necessarily industry standards. Might come in handy, as I have a friend who would like handmade shoes for her feet, which are two sizes apart!
 |
| The sole pattern, based on my own measurements. Looks gigantic. |
 |
| And a custom fit, matching upper! |
Just for the record, I don't usually buy used shoes. Can't stand the idea of putting on shoes that someone else has worn, it just gives me the willies. I figured that A) I could copy the pattern for the existing upper, since it fit fairly well, and B) I could then take the entire shoe apart and use the sole for a handmade pair. Try getting a custom made sole done for $2! If either A or B doesn't work, I haven't lost much.
I think that somewhere between the Shoeology patterns, the Bass shoes, and the design-your-own-shoe-pattern site, I might actually come up with a workable pattern I can use over and over. Looking forward to posting the work-in-progress soon!
And of course, while at the A.L., I found several garments I'm planning to use for a challenge issued by Stampington's Altered Couture magazine: refashion a garment a la Marisa Lynch
( http://www.newdressaday.com/ ), who has become quite the media darling for refashioning a garment every day for an entire year, using a budget of only $1 a day! Pretty inspiring, if you ask me! If and when I get that done, I will be sure to post about that as well.
Cheers!
Wednesday, February 9, 2011
We Interrupt This Creative Moment
It is amazing to me how quickly time goes by when I'm thinking, "Gee, I haven't posted anything for awhile - I need to get to the blog!"
Been doing some sewing work for the sign shop where I'm the on-call seamstress, and have been trying to get that job done in spite of my Sewing Assistant's "help." Yep, he's at it again. I swear, I cannot put any fabric out to cut, sew, or alter in any way without him plunking himself into the middle of it.
The tiny looking thing in the middle of the photo? That's the heavy-duty industrial double-chain-stitch machine I use to hem the banners for them ("them" being All-American Signs in Los Alamitos, CA). The table is about 10 feet from the edge right in front to that window cut-out. Why would I need a 10 foot long and 8 foot wide table, you ask? See that banner, there? It's about 12 feet long and made of heavy banner material. The bigger the banner, the heavier it gets. And I have to turn it this way and that to get to all the seams, so it's good to have something to hold all that weight. It's harder work than the sewing I do at home, but the owners are lovely people to work for & I really enjoy the work. The money comes in handy, too, during the 15 minutes it is actually in my hand before one or the other of the teenage boys announces that they need it for something or other.
Been doing some sewing work for the sign shop where I'm the on-call seamstress, and have been trying to get that job done in spite of my Sewing Assistant's "help." Yep, he's at it again. I swear, I cannot put any fabric out to cut, sew, or alter in any way without him plunking himself into the middle of it.
 |
| Now, exactly WHERE was that seam you wanted me to rip out for you? |
 |
| Oh, wait.....I see it now - BANZAI! |
I can't post a picture of the finished product (fooey!), because it will belong to one of their clients who is doing a very proprietary product. Just know that it is coming out pretty darn cool looking. And Miriam, if you're reading this, all the cat hair will be gone before I bring it in (LOL!).
Speaking of the sign shop, here's a picture of where I work:
 |
| Moi's Sewing Station! |
So somewhere along the line last night, while I was working on the >ahem< project, I got a bee in my bonnet about another project I've been dying to do for a couple of months. I used to sew handmade shoes for an Etsy shop owner in Long Beach, but since she doesn't call me any more to sew for her (Sad Face!), I decided to buy some patterns for women's shoes and try it myself, just for fun. Here's where I got the patterns:
I figured, for $15, I could make my own silliness and pay less that I would at, well, PayLess. Remember that friend I told you about that paid me for the mending by giving me a bag full of clothes? She unwittingly supplied the material for my first ever pair:
 |
| Hey, Kim! You remember these pants? |
And now, through the magic of sewing wizardry:
 |
| Wot da heck? Now they look like shoe! |
Okay, truth-in-advertising moment: this is about the third incarnation. There were several adjustments I had to make on the Shoeology patterns & instructions (and still, I have no quibble with the gal that sells them), but it was an experiment anyway so it's all good. These make completely lined shoes that are very soft (adjustment #1 - I need to interface both the fabric AND the lining to give it a little more body). If you sole them with suede, moccasin leather or vinyl, you end up with a pair of house shoes. A little hard to go outside and walk across any gravel. I'm planning to use a thicker leather sole to make a more outdoorsy type, and the folks at my local Tandy Leather Company are helping me figure that one out. The other adjustment I need to make is the toe box - this pattern would work very well for someone with wider, thicker feet. Alas, I have the polar opposite, and there is much too much shoe for the likes of me. Now comes more pattern alterations and a lot of experimentation. And tons more craft-weight interfacing. (Can you hear that? It's the good folks at Joanns Fabrics doing a cheer!)
Enough of the shoe magic for now. Back to the >ahem< project. Will post more shoe-y goodness later on.
Saturday, February 5, 2011
Meet the Sewing Assistant
Hey, there! Believe it or not, I didn't fall off the face of the earth! Just had a lot of things to contend with - you know, the usual illnesses, one trip to the ER, & those pesky migraines (both my son and I have had several in the last couple of weeks). When I wasn't taking care of him, or hiding somewhere in the corner of a dark room praying to get away from the pickaxe in my skull, I was working at the sign shop or doing some odd jobs here at home. Nothing glamorous, mostly mending - nothing camera-worthy. I did get to do some alterations on a boudoir gown, but can't post photos of the finished product just yet. That was a brain-bender for sure: it was manufactured in China, and it was a bit difficult to figure out how to make it work. It gave me an opportunity to play with some Wooly Nylon thread in my serger, which for some reason I have never attempted before. I was pleased with the results:
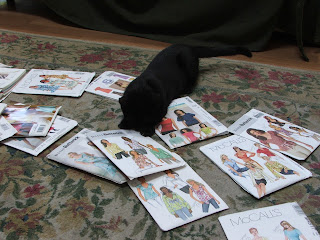
Ahh, but he also loves to help me with my sewing. You've seen him being a pattern weight, inspecting my machine's settings, and checking my work from the inside out. Here are some photos of him helping me sort patterns this summer when I was helping out a friend:


And now? Well, let's just say that when he climbs the back of my workroom chairs, it's all I can do to keep from being pulled over backwards:
That's it for now. I just bought a couple of magazines for inspiration (Designs in Machine Embroidery and Stampington's Altered Couture) - I'm really excited about working on a couple more jean jackets, so stay tuned!
 |
| Doing a narrow rolled hem with the wooly nylon in the upper looper. This is my powerhouse Husqvarna Huskylock 936! |
 |
| A close-up of the finished rolled hem - what a beauty! |
Part of the other reason there weren't that many crafts to post? This little guy. Well, little isn't the word we use to describe him much these days - he's 10 months old and a solid CHUNK of cat. And he insists on being my sewing assistant. His name is Neko-Basu, which is Japanese for Kitty Bus. Comes from the Japanese animated movie "Totoro." My son and his friends decided on that name, and it is apt for more than one reason. First, this guy is built like a bus. Second, his absolutely favorite thing to do? Be carried around the house in some kind of make-shift bus - a box, a laundry basket, sometimes even a plastic bag. He only gets mad if you stop moving. Odd how he lives up to his name, which started as a joke.
 |
| Going for a bus ride - this was an unscheduled stop, as you can see by his annoyed look. |


I am sitting here laughing, since he looks about twice this big now. This was when he was only four months old. Here he is, a little bit older (and fatter):
 |
| Why, no, I didn't need to get that pants pattern copied off these slacks. Go right ahead and use them as a kitty bed. |
 |
| Remember this one? He's on the grand piano. He takes up about half of it. |
 |
| On my bed. With a paperback book for comparison. Just FYI, it's a California King. He is stretched over half the bed. |
Subscribe to:
Comments (Atom)