Friday, April 27, 2012

Cra-zy Month, Part 2

Funny how when I know I'm going to have some time off after a grueling schedule, I always think I'm going to get a lot of my own projects done, the house cleaned, have time to read and watch movies no one else in the family wants to watch, etc....

Instead, I find myself vegging far more than I should.  Maybe I need the downtime, I don't know.  The upside is that now I can get caught up on unzipping and organizing a whole lotta embroidery files I've downloaded over the past two years.  I've found that when I can do a little bit every time I download, I can keep up - but it's like the coupons sitting on the dining room table - once I get behind because of work and the crazy busy rehearsal/performance schedule my son has, it stacks up and up and up until it looks like the leaning tower of Pisa.  Oof.  Same goes for my own projects.  You could say that my workroom looks like Pisa Squared. Or Cubed.  If the tower were made from piles of multi-colored fabric, anyway.

The nice part about getting a bit caught up is that I'm finding a lot of embroidery files I forgot I purchased - and now I can't wait to use in some kind of project.  I was literally jumping up and down in my computer chair when I unearthed a few of these last night.  The Sewing Assistant, briefly yanked from his evening nap, looked up at me like I'd lost my mind and then promptly fell back asleep.

Party pooper.

While I'm merrily unzipping away, between loads of laundry and dishes, here are a few more photos of what I've been working on this month:

Sales sample of a kimono-styled wrap top for a
new client.


The front was matched expertly by the patternmaker
I mentioned yesterday, along with the two-part sleeves
and the neckband.

The back was originally meant to be cut in two pieces,
which would have rendered the jacket much better fitting.
However, the patternmaker thought using this part of the print
would be better shown off by cutting it in one piece.

And more.  This one wasn't exactly my favorite.  It looked like something you might see in a Doctor Who episode.  


The most unfortunate thing about this jacket is that the client asked me to make up a pair of matching capri pants, and I was trying to match the print from the back of the jacket.  Since the patternmaker had cut the kimono top on the cross-grain, and it looked like this one was done the same way, I cut the pants on the same grain.  Only I misjudged that pattern on the back - so the print on the pants goes perpendicular to the pattern on the top.  Oy.  Not a good mistake to make on such expensive fabric.  While trying to get more fabric to remake the pants, the client also discovered something very unpleasant - apparently, the company had sold him some runs of fabric that have been discontinued and so now he is scrambling to figure out what he can show potential clients out of the run of garments we've made.  Not sure yet how many pieces in his growing collection this will affect - I should know by the end of next week (thus my sudden and unusual break time).

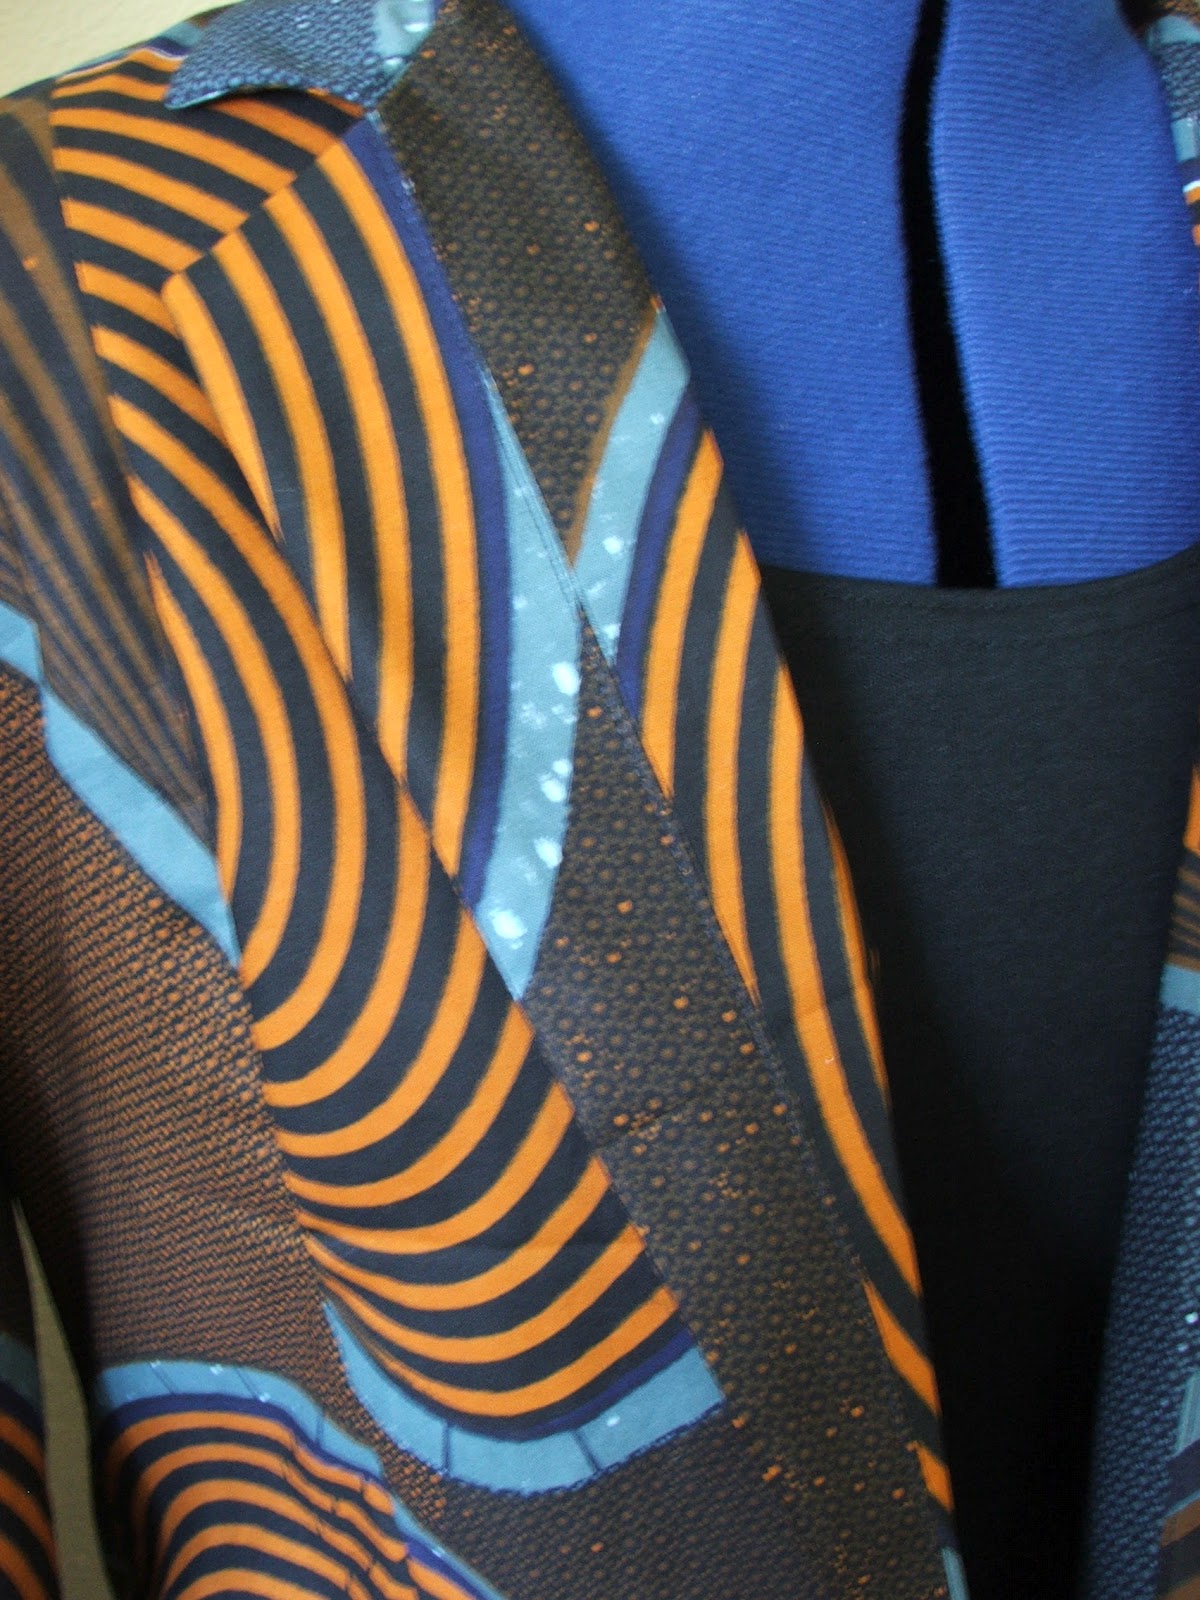
A more tailored, unlined jacket.
For some reason, the theme to the Twilight Zone
is running through my head now.

The patternmaker engineered these awesome
turn-back rounded cuffs.  I envy her skills, I really do.

Welt pocketses!

A two-piece lapel - honestly, I would NEVER have
come up with that idea in a squillion years.  A
brilliant idea for showcasing some contrasting or
artistic fabrics.

The pattern maker was experiencing some issues she needed to settle in her personal life, so the client asked if I would please cut out the next batch of garments myself.  OY.  His primary focus on these garments was to showcase, balance, but not EXACTLY MATCH the motifs from each of these prints, to set them off at their best advantage.  This was a little scary.  This fabric is from Holland, is custom printed (double sided) in a batik style print process.  Knowing what a genius the pattern maker was in the way she mastered the prints on the prior garments, intimidated doesn't even BEGIN to cover how I felt.

And this didn't help:

Not loving this next fabric selection, for another kimono & capri pant set.
Something seems vaguely familiar about this print.....

Oh, yeah.  
This is kind of what the inside of my head feels like 
during a migraine, if I could visualize it.  All this print would need for illustration
is a giant pickaxe slicing through it and it would be complete.
The background reminded me of the old-fashioned pillow ticking I remember from very
uncomfortable, prickly feather pillows from my childhood.
UGH.  What a combo of ideas.  No wonder I had such an aversion to it.

Meh.  There was really no interesting way to cut this
fabric so that there were motifs highlighted or balanced
anywhere in the jacket, which was the client's primary focus
on this line.  Tricky, tricky, tricky.
Now this one reminded me of those wonderful Hermes scarves that
beautiful jet-setters used to wear back in the 60's.  


Fantaisies Indiennes 
signed Loic Dubigeon,
mint condition

Not too bad, but still very tricky to try to balance
out the larger motifs.  Especially since each panel  was not
symmetrical in any way.
Bird sleeve.

In the middle of my engineering nightmare, along came these cute little orders for the Sweet Tart Lab:

Tweet tweet!

Minky fabric.  It cures what ails you.  Just sit and pet for as long
as it takes to calm down.

Thursday, April 26, 2012

Cra-zy Month, Part 1

I think I'm going to wait to title this post until I figure out what my theme is.  I had no idea it had been this long since I last posted; it's not that I was taking a break from it, just that I had enough client work over the last month to choke a horse and didn't even have time to clean the house properly, cook a decent meal, and attend more than a few meetings.  If you were directly affected by any of the above, my profuse apologies.  If you were indirectly affected by any of the above, hopefully this post will sate your curiosity about why the long absence.  (And if you really don't care one way or the other, you're welcome to read on anyway.  Just sayin'.)

I got an email about a month ago from an enterprising young lady that lives nearby (that's Huntington Beach, for those of you out-of-towners), asking if I were still interested in doing some work for her.  Truth be told, I didn't even remember responding to her ad.  Turns out, I had - about a year ago.  She had kept my name on file all this time, and when her customer made a repeat request for the caftans she made last year, she shot me an email to see if I could work it into my schedule.  40 garments total, with about a two-week turnaround time.  That's more garments than I've ever churned out in such a short space of time!  I also got a call from a neighbor who knew someone looking for a seamstress to help him out with a prototype project for sales samples.  That turned out to be an order of about 9 garments on top of the other 40 - and they came straight from the patternmaker - completely original patterns, custom drafted - what a learning process that has been.  So now, I have access to a patternmaker who was a complete whiz at putting these together and making them work.  Perfectly.  I SO want to study with this gal - she teaches at FIDM in Los Angeles, but has a studio in Artesia (http://taylorslacebridal.com/index.htm).  Not only is she amazingly adept at drafting custom garments, she also sews and tailors beautiful couture dresses.  'Scuse me while I go wipe the drool off my chin.  Unfortunately, FIDM won't let someone like me just come in and take a random class or two - you have to sign up for the whole two years' of study, or nada.  So I'm hoping that this lady can do what SHE'S hoping to do - teach patternmaking classes out of her own studio.  I told her I'd be first in line at the door.

Some of the nearly 50 garments that came out of my studio this month:

Stacks and stacks of finished caftans & crop tops.

Cream caftan, with cream color Venetian style lace.
Totally drool-worthy.

My camera hiccuped again.  It really has something against black fabric.
This is the counterpart to the above - it really is black, my camera just
couldn't figure out how to focus on it and threw a lot of light into this shot.

The cutest trim EVAH! 

The cream colored crop top.

Cream colored caftan.

See?  It is black.  Only now, my camera couldn't figure out
what to do with all that lace.
Dorky camera.  It is a really decent one for the price, this is
the only problem I've ever had with it - photographing something black.

The crop top with the Cutest Trim EVAH.  A little pain-in-the-buttish
to sew on (because I had to sew through the petals but around the center),
but still - SO cute. 

I'll have more photos of these later on - the client had some great shots taken at her friend's house in Los Angeles that do these much better justice than my blue lady, here.

Speaking of later on, I'm going to have to post the rest of this in Part Deux tomorrow - having time off makes me want to just snuggle in with a good book and a couple of cute kitties!


Sunday, March 18, 2012

Outdone by a Ten-Year-Old and Other Humbling Events

The last post I made (Going Polka Dotty) has become my all-time most viewed post.  It garnered a whole lot of interest, and rightly so - and I'm hoping it won't be too much longer before I will be able to show you a bit more of Son #1's girlfriend and her creativity.

Knowing now that the girlfriend has that innate craftiness & a creative bent, my neighbor and good friend Chris brought over a bag full of purses that she thought the girlfriend would enjoy either using, upcycling, or passing on to her friends.  There was a story behind every one of them and my son & his girlfriend were really interested in knowing the history.  So Chris started talking about her family's history in crafting & stitchwork, and then invited us over to see some of her handiwork and that of her mother, grandmother, great-grandmother, great-aunts, and other family members.  She showed us some little purses that her mother & grandmother used to carry with them to special occasion events.  Be prepared to be rocked out of your socks!

Chris was trying to describe to Son #1 and his girlfriend what Petit Point meant (pronounced "petty point").  For those of you who don't do needlework, Petit Point is simply a smaller version of needlepoint, using canvas or fabric that had much tighter weave than what you typically see on a needlepoint canvas today.  As a matter of fact, until today, I had NO IDEA how small Petit Point could actually get.  I couldn't even see these tiny stitches without some high-powered glasses!

A Petit Point purse, about 6.5 inches wide and about 5 inches tall.
A close-up of the beautiful closure on the frame.  And now you can see more
clearly the tiny, tiny stitches that were on the surface.  
Amazingly, this purse had a compact stitched to match.  Inside were a couple of old
calling cards from Chris' grandmother & grandfather.  This compact is about 2.5 inches wide.

Hold onto your hats - you ain't seen nothin' yet!


A purse that had belonged to Chris' grandmother or great-grandmother.  You
can click on this image and see it larger, to get an idea of the detail in the ballroom scene.

The gorgeous frame clasp.  We were trying to figure out exactly what
"Haskenbale" meant.  The purse was made in Austria and was lined with
the most beautiful yellow silk, and you could see the handstitching where it
attached to the frame if you looked carefully.

Mind-numbing.
Just....
wow.

I counted (with a magnifying glass):  that's about 40 stitches to the inch, folks.

The reverse side, with a tableau of knights.  Or maybe they were actors portraying knights.


Made in Austria.  

This purse's matching compact.  This one was about 3 inches wide.  

I thought about attempting to do something on this scale and couldn't even wrap my head around it.  Just holding a piece of history in my hands, though, I thought was enough.

Turns out, I was wrong.

Chris had taken us around her house to show us the various pieces she and her family members had done over the years, and they ranged from needlepoint pillows to chair seats to bell-pulls (and we were joking between the two of us that, darn it, no one ever seems to come when you pull them....).  Then she took us upstairs and started showing us some family samplers.  There was one brightly colored cross-stitched sampler in her bedroom that was dated 1934, with a Pennsylvania Dutch type picture and alphabet.  But nothing could prepare me for the sampler she had framed and in her guest bedroom.  (For any of you unfamiliar with what a sampler is, click here.)

Here is my giant piece of humble pie:

Combination sampler, most likely on linen, with alphabets done in buttonhole stitching (the top set - those are not knots, they are tiny.  Little.  Buttonholes.),
cross stitching (script and block lettering), and candle-wicking stitches.  

Just look at those tiny, tiny (did I mention TINY?) buttonholes making up the first set of lettering.
The top portion is crewel work, done in a sort of feathering stitch, some in chain stitching, some in
split-stitch.  I think parts of the columns on the sides were done by couching, but I could be wrong.

Now the Humble Pie part. Students of needlearts were expected to sign and date their work, which this young lady did.

If you thought you saw that wrong, you didn't.  This work was signed:
"Sarah Catherine By Me Aged 10    1818"


Talk about being owned.  Here I was, so proud of myself a few weeks back for being able to size up a dress pattern and drafting one from scratch - and being so scared to do it - I was now holding in my hands a stunning exhibit of hand stitching perfection that had survived intact nearly 200 years (thanks most likely to a very loving and appreciative family), done by a 10-year-old little girl.

Speechless.  Thank you, Chris, for allowing us to geek out over such a cool set of family heirlooms.

Sunday, March 4, 2012

Going Polka Dotty

At long last - I'm able to post the most amazing refashion!  I've been teaching Son #1's girlfriend how to sew, but I certainly don't have to teach her how to think or be creative - she has such a wealth of fresh ideas and can see so much potential in the most common garment - and even though her sewing skills are still in development, she has no fear of reaching her goal.  Such an awesome student to have!

We went to the Assistance League, where I have been getting most of my garments to refashion myself - she was so intrigued with all the bits and pieces I've brought home, that she requested that I take her on a trip to see the place for herself.  It was so worth it when she spotted this maternity skirt - her eyes just lit up and I could almost hear the gears turning!

Silly me, I didn't take a photo of the skirt all in one piece (she was so eager to get started, I swear as soon as we hit the house the scissors started flying) but here it is right before it got really chopped up:

She wanted the skirt of the dress to retain that cute flippy look ,
with the underskirt intact.  We sewed the bottom part together
where we cut it from the original skirt so that the layers
wouldn't shift.  In theory.

She had a design in mind and brought over a dress that she had borrowed from a friend of hers that fit pretty well and she liked a lot.  From there, we found a similar bodice pattern in my Lutterloh collection, took her measurements, and drafted a fitted bodice pattern:


We then made a muslin from this pattern, tried it on her, and I pinned and adjusted it for fit (not photographed).  From there, we cut the outer pieces and the lining pieces from what was left of the top part of the maternity skirt.  Yes, she lined it.  Lining a dress (or jacket, or what have you) used to scare the bejeezus out of me, until I started sewing the maternity dresses for Jules Ford just this past year.  Yet she tackled it without hesitation, only asking me how to get from point A to point B, and soldiering through it all.  Such bravery!

She learned a lot in the process (and quite possibly some choice swear words from me, as those darn skirt layers kept shifting, and shifting, and shifting.....): how to draft a pattern of sorts, how to make a muslin and adjust it, how to line a dress with a fitted bodice, how to insert a zipper, how to gather the skirt, and some of the hand-finishing techniques used on a lined dress.  Just blows my mind; at that age, I think I was still getting over making a mediocre C- on the simplest A-line Home Ec skirt project ever.  That experience almost made me give up sewing forever.

All of this was accomplished over the course of about three weeks, with the last of the hand-finishing done this afternoon.  She could only work on it in spurts on the weekends, because she carries quite a full load at school.  But it was oh, so worth it:

Mission accomplished!
Nothing quite like the satisfaction that comes from wearing something
you created, from the design idea through to the finished garment.
This bodice fits her perfectly, and we can use the adjusted muslin to
work on future projects.  Bonus!

Tried to get a better shot of the bodice - but my camera just hated
focusing on that black and white fabric.  I think her smile was
more important, anyway.

Another view - we tried so hard to keep
the flirtiness of the underskirt/overskirt, but that
top layer of sheer chiffon-type fabric almost
drove us nuts.  But she persevered!
Polka Dotty!


(These four photos were taken by Son # 1)


And yes, for those of you wondering whether the Sewing Assistant had a hand paw in things, I can assure you he did.  Here he is, consulting with her about her next refashion:

"Now about this seam, here....this is what I think you should do...."

....and consulting with me, over camera settings and such:

"Here.  Let me help with those buttons....or maybe that dangling lens cap...."


Friday, February 17, 2012

Absence makes the blog go flounder

LOL!  Not the best title in the whole world, but I'm pressed for time while altering about 20 percussion ensemble uniforms for tomorrow's competition, cooking for 50 (for the same comp), experimenting with meatless taco filling for the vegetarians in the ensemble (and the instructors - here's hoping it's not an epic fail!), trying to fill orders for a couple of regular clients and juggling smaller jobs that have started coming in again....

Not sleeping much these days!

Somewhere in the middle of all of this, I helped my son's girlfriend work on a spectacular refashion.  I'd love to post photos, but she took the dress (made from a maternity skirt) home to complete so we don't have pictures yet of the finished garment.  Soon, I promise.  Soon.

I also got a bee in my bonnet about my purse - I made one a couple of months ago, and found that even though I loved it, it was too cavernous for my taste - I just couldn't find anything in it.  So I decided to start recycling some jeans that a really good friend donated to the cause, and using a Vogue pattern, this is what I came up with:

This is the front panel, with an external zippered pocket.
The fabric was a freebie from Dorell Fabrics in Fountain Valley-
they sell upholstery material but sometimes they have
bits and pieces that are just too small to do much with -
you can take one free sample every time you go into the shop. 

The inside of the front pocket.  It's lined with another
recycled garment, a blouse that a friend didn't wear anymore.

The inside of the purse, with a couple more open pockets.
Nothing moves in here when it's zipped shut, and it's not so
deep that I can't see things when I'm looking for them.
Bonus!

My favorite part of the pattern - a side zip pocket.
You can put one on either side of the purse but I opted to
put only one in this time - I only had one zipper of this
length and color.  Next time I will line this particular
pocket (and the matching one on the other side, should
I put one in) with a fabric that matches the outer
fabric - the way the zipper is put in, you can just see the lining
around the perimeter of the zipper.  Bummer.  But this one's
not for sale, anyway, so lesson learned.  

Nicely reinforced shoulder strap (while not being too stiff); bag is stablized with fusible fleece so it is still a bit slouchy but doesn't slump; lots of pocketses for everything to have its own place (with a nod to Lord of the Rings); overall a fairly easy pattern to work with.  This may become my favorite bag pattern.  And I have three boxes of jeans to go through....each pair renders one complete handbag using this pattern (Vogue V8661).  I've already had two requests to make more, with fabric for the front panel that has special meaning for the recipients.  A nice way to refashion jeans and to keep a treasured swatch of fabric close at hand!

Of course, the Sewing Assistant remains hard at work, inspecting each incoming order, large or small.  

Or comfy, regardless of size.

Quality Control Expert, hard at work.


In other crafty news, it appears that my sons have been bitten by the craft bug.  Picture any other 20 year old young man, dressed head to toe in black (and variations of black), rides motorcycles, studying to become a machinist and loving every minute of being able to work with his hands, up to his elbows in some kind of engine fluid or other, surrounded by motorcycle bits and parts.

Now picture that young man making something as cool as this to give his girlfriend for Valentines Day (and reserving a single bloom for his dear ol' mum):


These are coffee filters, folks.  Watercolored by hand, hand cut, hand crafted with floral tape, and accented with extra recycled leaves cut from silk roses from one of my projects long ago - my wedding bouquet!  He presented them in a recycled tin from the Pirouline type cookies.  

Dude's got good genes, both the refashioning and the crafty kind.

If you look very carefully at that first photo, you can see the man as a little boy in the photo in the bottom right corner - he's the one dressed in red.  :)  


Tuesday, January 24, 2012

Whoa - It's Only Mid-January and I've Already Learned Something

A couple of things I've never attempted before (neither sober nor otherwise):  pattern drafting, and pattern grading.  For a very good reason.  Classes in flat pattern making are getting harder and harder to find at the local colleges - there used to be two nearby Community Colleges that had the class, then it went to every Spring when they downsized, and now I can't seem to ever find it listed.  Sigh.  Taking a computer-aided drafting class is all well and good if you can afford the software on your own - and that can run anywhere from $500 to over a grand, depending on what you want to do with it.

I don't know about you, but I don't currently have that kind of money floating around, just waiting to be frittered away on more software.

So over the years I've collected pattern-drafting books, both new and used (and the really technical ones?  You can pay around $200 for them sometimes.).  One came with a test version of the software, but it doesn't allow you to change the pattern styling, it only allows you to use the four or five patterns and type in your size to make that garment for yourself.  You can't save anything.  And the garments are ugly.  Most of the other books teach you how to alter a pattern to your liking - not quite what I'm after, but it's a start.  Unfortunately, some of these are so lightweight when it comes to explaining exactly what you're supposed to do that they are all but useless.

I keep hoping that I'll eventually have enough time to study all of these books, test out their advice, and see if I can figure out for myself exactly how one goes about drafting a pattern for a garment one would like to make, as well as grading it (for my non-sewing peeps, that means drafting multiples of the garment in different sizes).  But it's a daunting task.

Enter my pregnant client.  She is miserable right now, and since this is her second child, of course her body remembered EXACTLY how to expand at light speed.  So nothing fits.  She emailed me in desperation, hoping that I could whip out some roomy garments for her to wear before she had to start raiding her husband's closet (and we all remember how trendy that looks, right?).  Only her favorite pattern that she gave me was for her pre-pregnancy size and wouldn't fit her anymore.  And is no longer available.  ANYWHERE.

Sigh.  I got to work on some of the other garments we talked about, but that one dress kept coming back up to haunt me, along with another one that she really, really likes (The Soiree Dress from the Hatch Collection).  I so wanted to give her something other than just plain, boxy, oversized t-shirts to wear.  But these two dresses scared me half to death.  I didn't want to botch the process and waste the fabric she'd already bought.  But it kept me up at night - I just couldn't stand it and decided that I had nothing to lose.  I went to the local fabric store and bought inexpensive knit material to attempt the Soiree style (figuring that if I botched it, I was only out about $12).  I spent days and days and days (and sleepless nights) working things out in my head.  I cut out a couple of test swatches to see if I could figure out how to do that fabulous draping, or something similar.  I blew up the photos from the web site to see if I could figure out the construction.  No luck there, since they were too low resolution to be of any help.
Here is their version, in silks.
Now you can understand my freaking-outedness.

I was about to give up when a sewing friend happened to come over to pick something up (completely non-sewing related) and I snagged her for a quick look-see.  She ruminated about it, took a look at the pattern I'd drafted, looked at the sample, and picked up the fabric panel I'd cut out and started draping it on me.  She looked at the one on the internet (even though we couldn't do an extreme closeup, darn it) and agreed that I was on the right track.  That gave me what I needed to get over my fear of failure.  So after sewing it up and trimming off the excess at the bottom, here's what I came up with:

Here is my version, waiting for hems.
And for someone with legs.
Not bad for my very first drafting effort from scratch.
Don't bug me right now about the lack of finesse.

And I just happened to catch the First Sewing
Assistant, Retired, there in the background.

About five seconds before the Current Sewing Assistant
went diving through the skirt.

I'll let you know how that one goes over (thankfully, not literally) - I'm just glad I was able to get that shaping & draping without jumping off a bridge somewhere. (My eternal thanks, Laura!)

As for the other dress, I was crushed when I got home from my client's house to find that the pattern was never going to fit her in her current state - we both looked, online and in stores, and no one has that pattern anymore. In ANY size.  (Curse you, Butterick - it's a cute pattern, too....)  I kept taking it out of the envelope and staring at it in a mild panic, and then setting it aside.

The Sewing Assistant decided to go to work on grading it himself, using his own particular method:


Yeah.  It's a real easy pattern, until you try grading it yourself.
Look at all those lovely, interlocking, self-lining pieces.
Along with more of that side draping.
That needs to be expanded to accommodate pregnancy.
(Cue mad screaming and running for the hills here.)

After letting the Sewing Assistant take a stab at it (literally), I kept thinking, and thinking, and thinking.....I'd read articles on how patterns are graded commercially and what parts of the pattern can be expanded, while others areas need to be increased only infinitesemally infinitismally MICROSCOPICALLY.  Threads published a really good article on it not too long ago.  I sure wish I could find that particular magazine.  (Want a matching headache?  Here's part of the article: http://www.threadsmagazine.com/item/4368/making-sense-of-pattern-grading/page/all)

Thinking.

Thinking.

And finally, I just DID.  This was after I talked her into letting me draft a very simple caftan, similar to the styles you can find in any department store right now.  I just couldn't admit defeat.  So I took out my rulers & my drafting pencils and got to it.  I looked very carefully at the pattern pieces and where the existing sizes were drawn out bigger (and how much bigger), where they stayed the same or moved very little, found some points of reference (like corners and pattern markers), and drew a straight line out along the existing points to where I thought the next size would be and marked a new point on the pattern paper I'd taped onto the old one.  I followed each pattern piece around and continued drawing out new points, connecting them by following the contours of the existing pattern piece.  In some places I just eyeballed it - I couldn't tell by how much it should be increased (there was no continuity between sizes in those places).  I cut out the new pattern pieces and then the fabric (shudder, shudder, shudder....that she brought home from NYC).  

And just about died when it all came together and fit perfectly.  Well, almost.  And that wasn't from the inexpert grading, it was actually a sewing bobble I can't believe I did.  

You can't see me now, but I'm doing The Happy Dance.  Alternating with the Duck and Cover Dance, since I imagine someone else is going to ask me to repeat this miracle performance, and I'm not quite sure I'll be able to.  But crisis averted for this client, for the time being.  


I just hope she doesn't get too much bigger in the next couple of months.....

Friday, January 13, 2012

Crafty Cat and Crafty Hats

Wow.  Where on earth is January going so fast?  You'd think someone somewhere sped up the cosmic clock or something, the rate it's going.  I'm still geeking out about how quickly 2011 disappeared, apparently while I was off looking in another direction.  In a state of total bemusement, most likely.

Not as much as usual to show for the first (nearly) two weeks of the new year - but I haven't been totally idle, mind you.  Just not swamped.  I'm luxuriating in that sensation, I can tell you.  I'm sure more work is coming down the pike faster than I can say "I'm sure more work is coming down the pike..."  While I've had some breathing room from client orders, I decided the time was right to work on some sewing for charity - and to start a new "tradition" for the Sewing Assistant, who, try as I might, simply refuses to stay fired.  Looks like he has tenure.  So, while he remains (permanently) in my employ - following no one's rules but his own, of course - he might as well dress the part, don't you think?  I was chatting with one of my clients last week about a project we will be working on and we were both laughing about how neither of us currently wears things to represent what we do - which is silly, actually, since I do so much sewing for other people.  I should really be wearing my own work.  What better way to advertise my skills than that?  Somehow, it always seems to be selfish or idle, since I'm not getting paid for it.  Yet, the reason I wanted to sew like this in the first place was to continue my lifelong pursuit of creating things with my hands, and making a statement about myself in the process.  So that is this year's goal (not resolution - GOAL - I have found that when I attach the former word to my plans, they go directly out the window) - to start WEARING MY WORK.  Literally.  And I'm planning to have some fun with it along the way.  Whether it speaks about my identity remains to be seen, but it should definitely speak about my abilities, at any rate.

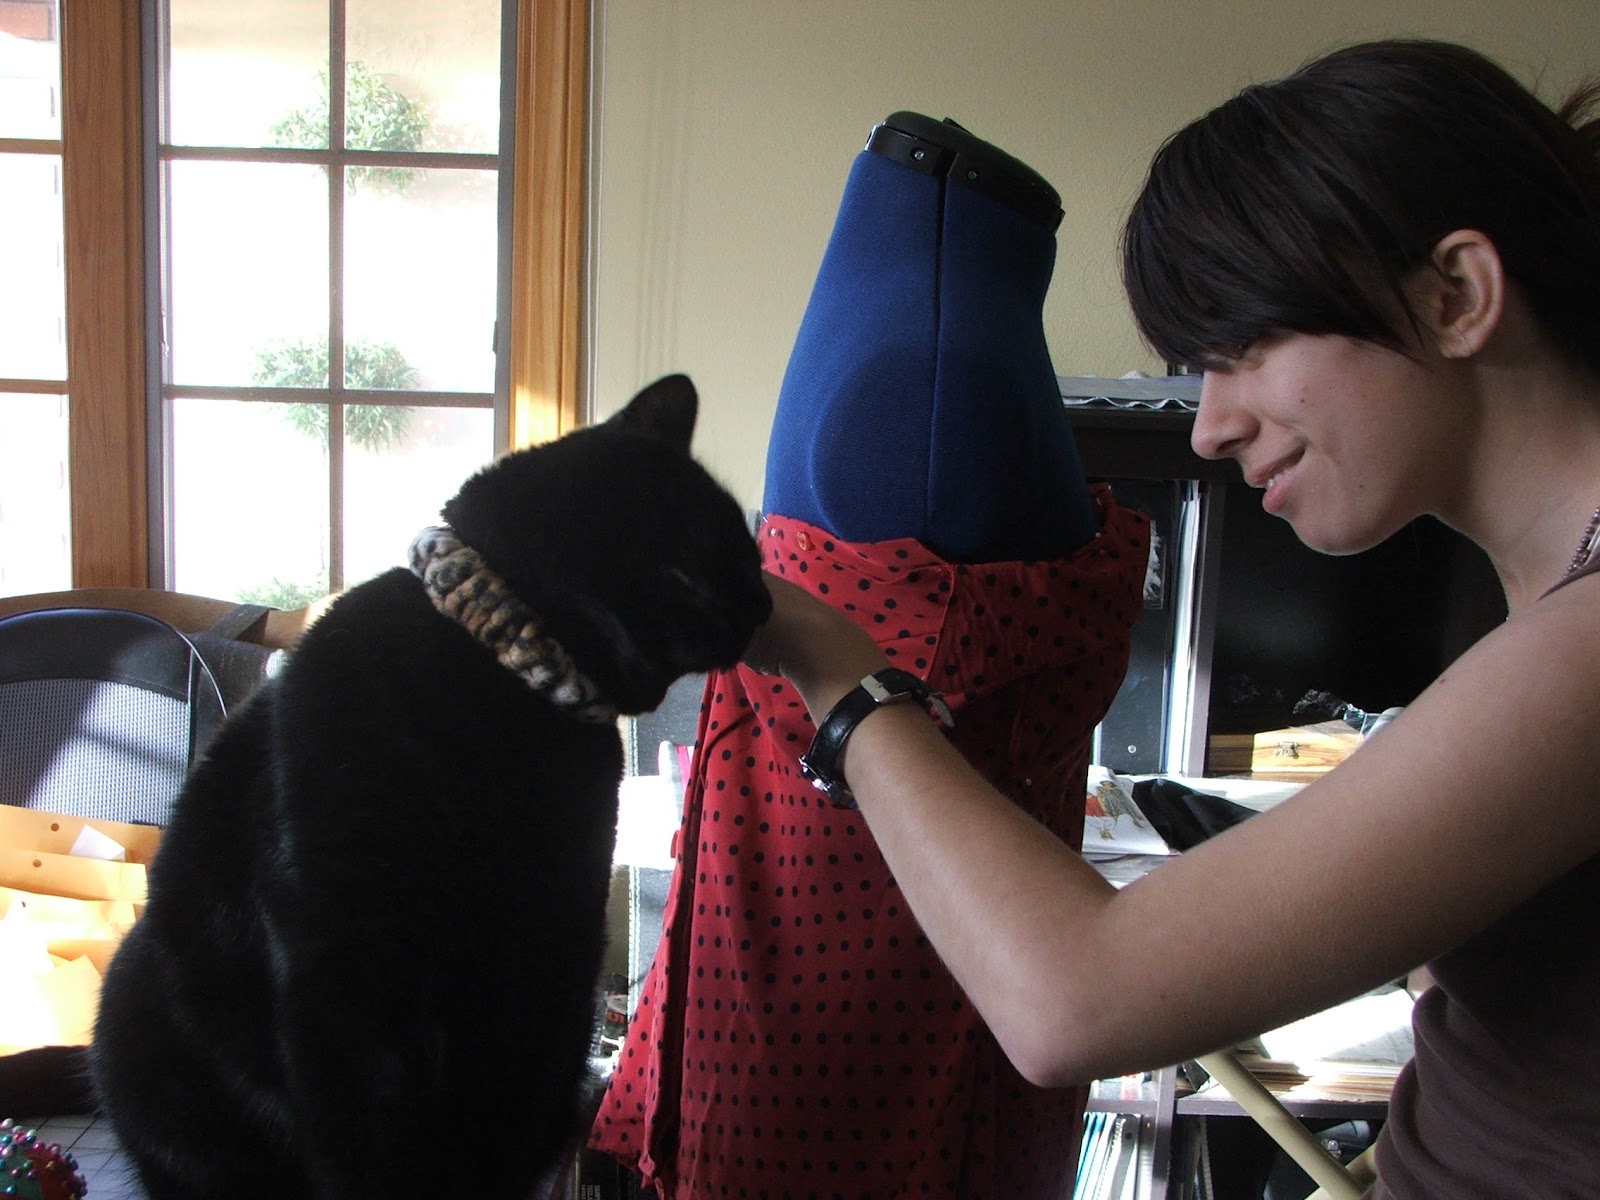
So since I have made plans for making things for myself to help represent me, my work, my abilities, and my craftiness/artfulness, I figure the Sewing Assistant should reap the same benefits.  And boy, does he like to strut his stuff.  I've been making him interchangeable collar covers every couple of weeks since right before Christmas, and I've never seen a cat look for so much attention due to what he's wearing before.  It's pretty humorous to watch him preen in front of anyone who notices the new collar cover - you'd think he was posing for the cover of Cat Fancy or something.

 REPRESENT!

Neko wearing his Christmas striped collar cover, while simultaneously
attempting to un-decorate the tree my son and his girlfriend had
just finished trimming.  What you can't see here is the ornament
he just knocked off the tree onto the floor, shortly before he
jumped down to play soccer with it.
And yes, that is his handiwork you see there on the back of the couch cover.  Yes, indeed.  Scratching posts be damned.

I didn't get a photo of the second collar cover, which we all decided needed to be changed after the New Year.  I made that one out of a lovely blue background with white frosty trees.  Plus glitter.  Lots of glitter. I thought it would make all the teenage/twenty-something guys who come and go around here (quite a few of them on motorcycles) groan and roll their eyes.  Strangely enough, that hasn't been the case.  And now as soon as they come in the door, they are all asking, "Where's Neko?  What's he wearing today?"

Sounds like a serious Sewing Challenge to me.

The third collar cover to make its appearance so far this year:
Leopard Velboa.
Fuzzy, Big Cat-ish, and Stylin'.  He's loving it so far.
And loving my sewing chair, as you can see here.  He keeps stealing it....

Thankfully, most of these are from either the remnant bins or the flat-fold (i.e. CHEAP) sections of the local fabric stores I've been known to haunt.  So when he trashes one (like the pretty blue one I didn't have a chance to photograph), I don't worry about it too much.  He provides such a nice contrast to any color or print I can put on him, I predict that this is going to be the start of quite the wardrobe.  Maybe I'll need to hire a stylist for him....

I probably should hire one for myself, while I'm at it.  My friend whose daughter is working on her Girl Scout Gold Award wanted to take a photo of me with the huge sack of fleece hats I made for the project.  (About 38 or so of them, actually.)  Of course, I couldn't just stand there and hold them.  I absolutely had to wear one.  I chose the one that made me think of Winnie the Pooh for some reason.....

Her camera was acting up, so we had to suffice with
a cell phone shot, which is why I look very disproportionate.
Yeah, that's my story, and I'm sticking to it.

I had wanted more of the red to show up, because this hat just
screamed POOH!, but it doesn't show here as much as I had wanted.
Most likely due to the giant hair clip I had holding my hair in a bun
in the back - it kept pulling the hat to the back so you couldn't see the red.

It's awesome to work with a young designer - she's been making these hats herself, to wear to night practice during marching season, to give as gifts, etc. for quite some time now.  Her designs are clever, colorful, and a whole lot of fun to see & wear.  She's making this batch (somewhere in the neighborhood of about 100, I believe) to give to kids in the hospital, especially to chemo patients.  I can't wait to hear how well they are all received.  I can't imagine ANYONE stifling a smile or an outright fit-o-giggles when they start modeling these.

Any time you can bring a spot of joy into someone's life, no matter how briefly, is well worth it.  Which is why I always accept projects like this - helps me keep my head on straight by helping me put things into a greater perspective.  And I can never fault the time spent doing that.